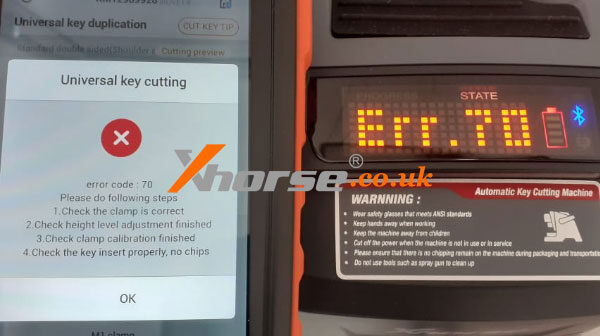

New feature tail correction has been released recently on Xhorse Condor XC-MINI Plus II. It’ll allow you to modify an ordinary key blade to a key that can be used in a flip remote. Following let’s take a look at how to do it.
Tail Reshaping
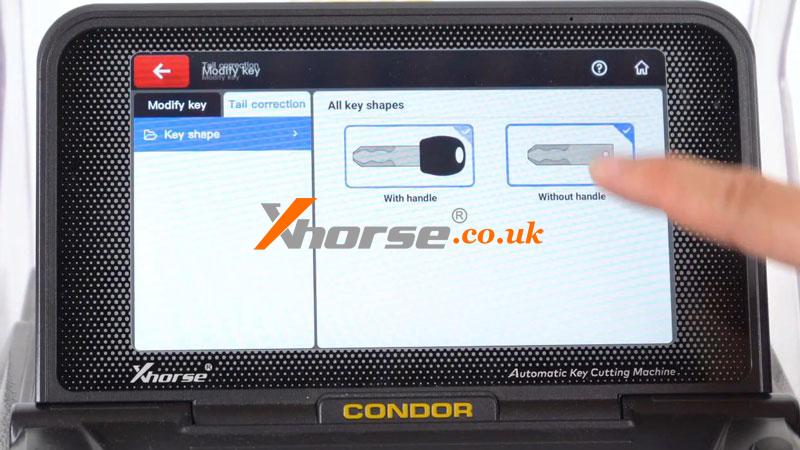
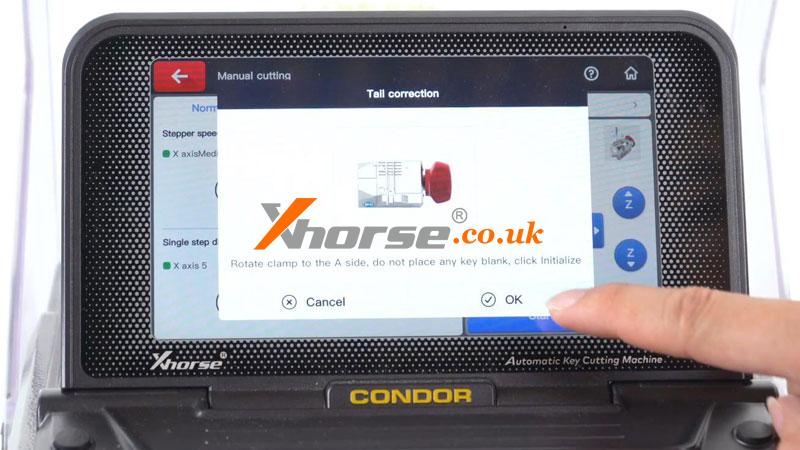
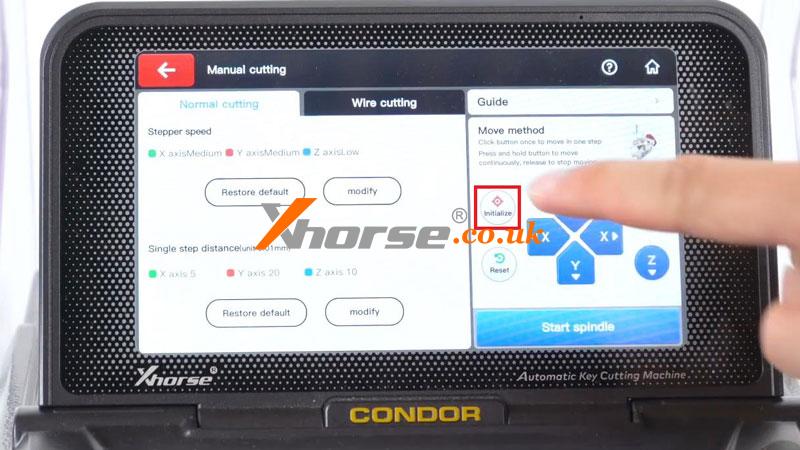
Modify key >> Tail correction >> With handle
Rotate clamp to the A side, do not place any key blank, press “OK”.

Tighten the M5 clamp, press “Initialize”.
XC-Mini Plus 2 calibration completed.
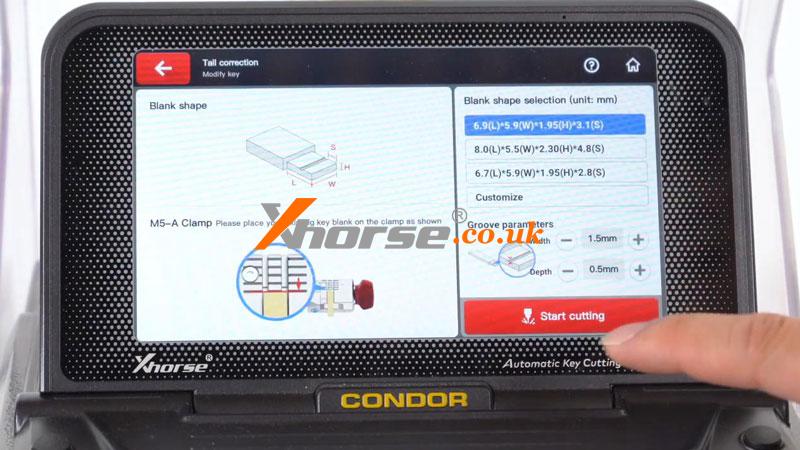
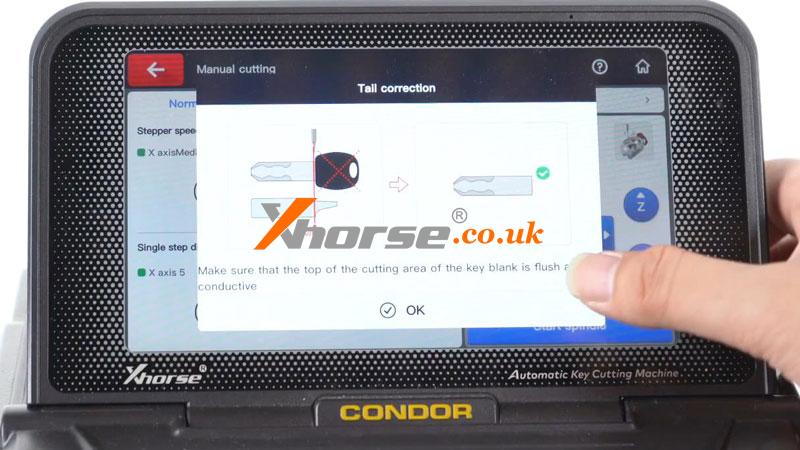
Make sure that the top of the cutting area of the key blank is flush and conductive.
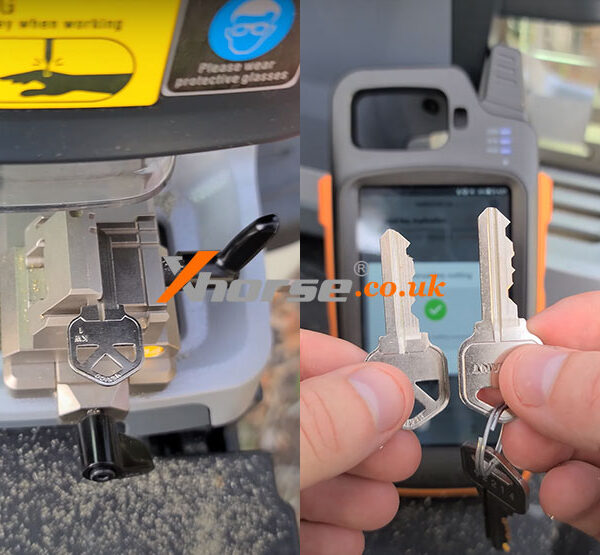
Insert the key blade
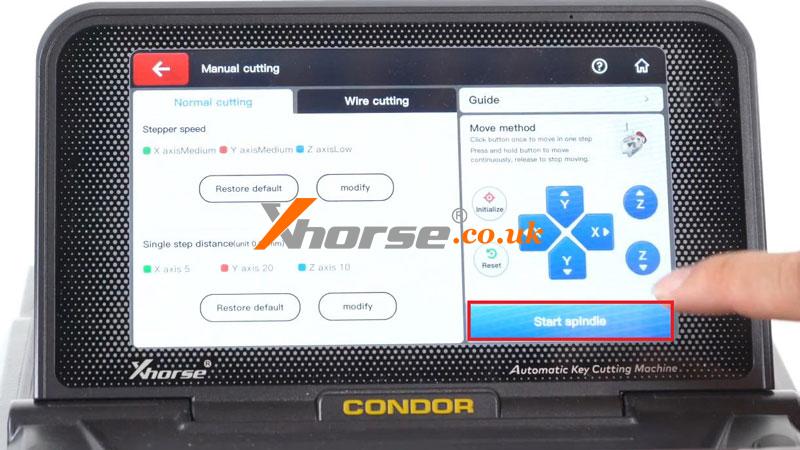
OK >> Start spindle
To an appropriate position to cut the tail of the key.
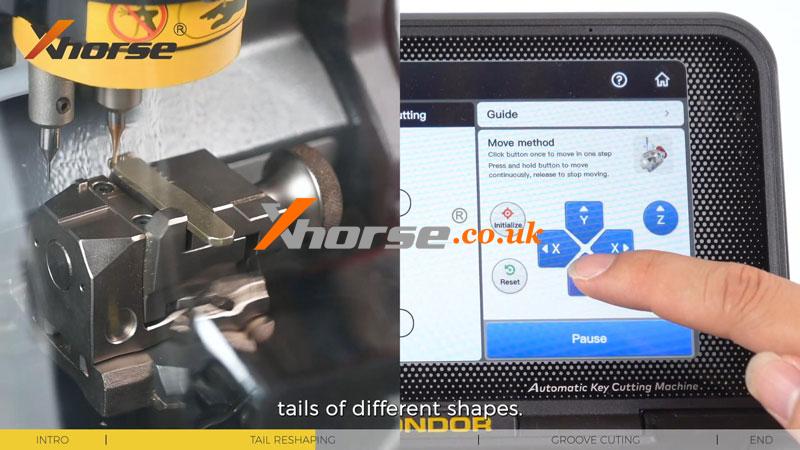
In this step, you can completely remove the key tails of different shapes.
Now you can see the tail of the key is removed.

Groove Cutting
Now let’s choose “Without handle” this time.
Insert the key blade onto M5 clamp again, press “Start cutting”.
In this step, Condor MINI will detect the key itself and start automatic cutting.
So all you need to do is make sure you remove the tail in your last step well.
Cutting key completed.
Clean the shavings.
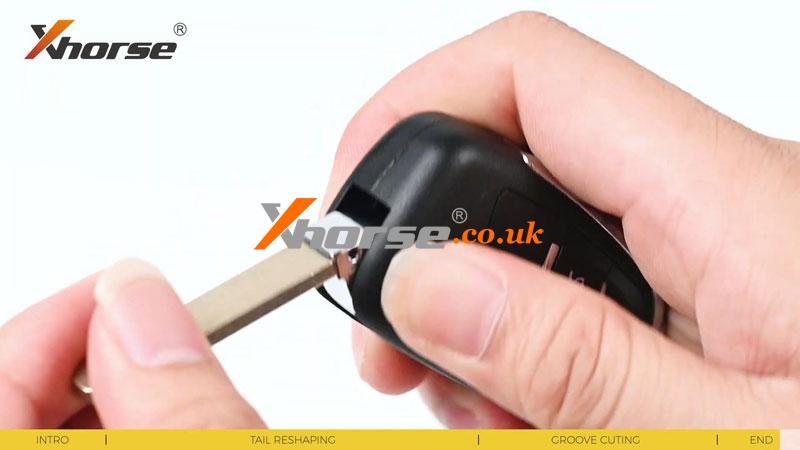
Now you got yourself a brand-new key blade.
And you can stick the key blade to your flip key remote.