
This is a tutorial on how to read and write Microcontrollers with XHORSE Multi-Prog Programmer. Read this article to learn the procedure.
1. Check Model
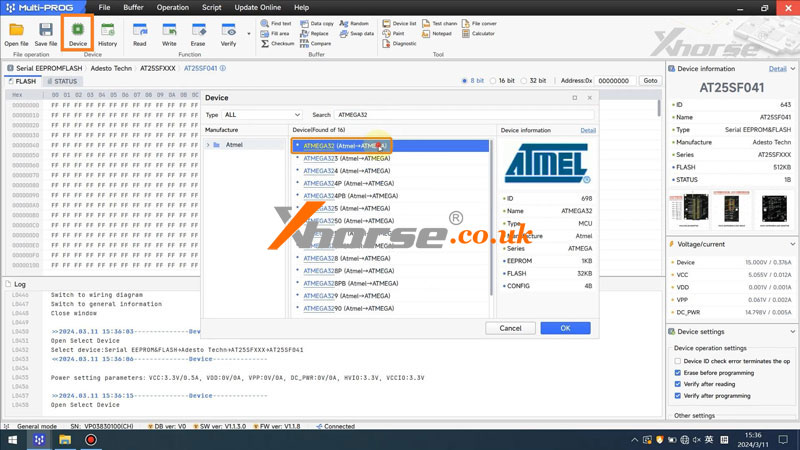
Check the model of the microcontroller, and open Multi-Prog software.
Click “Device” to enter the model number: ATMEGA32
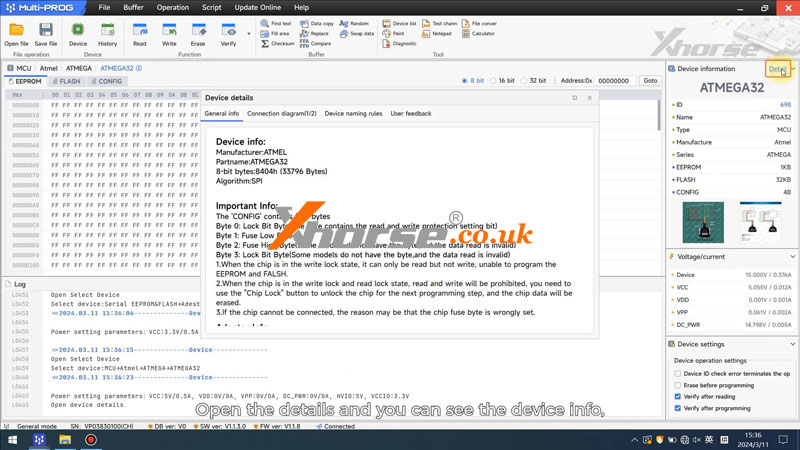
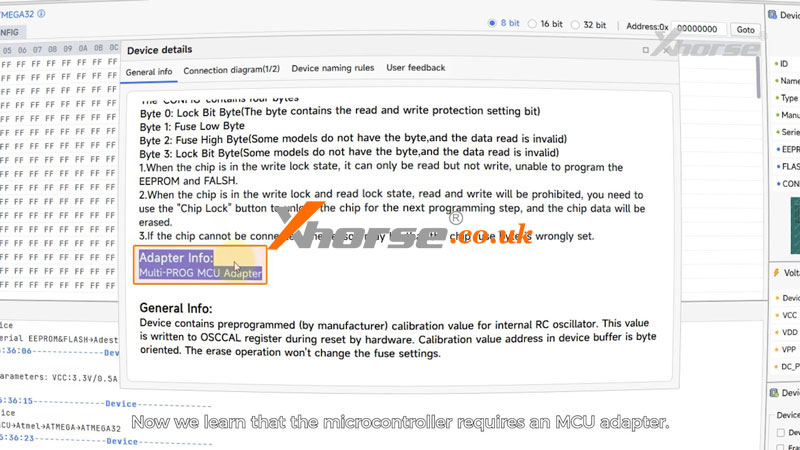
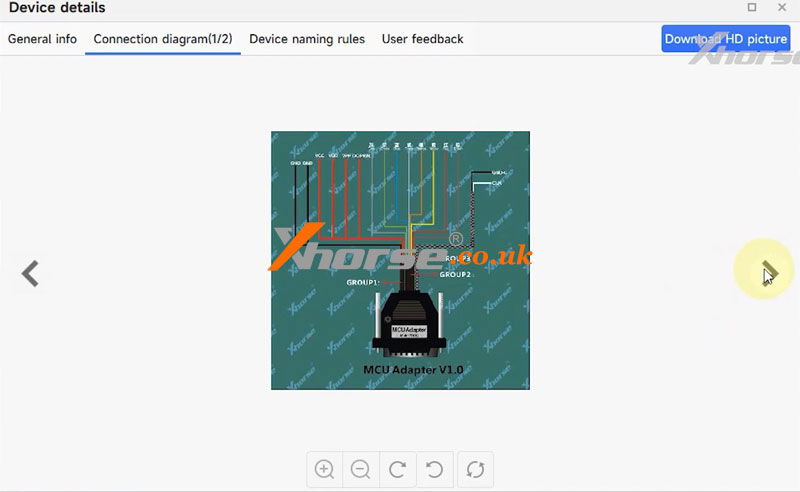
Click “Details”, and we can see the device info, important info, and adapter info.
And now we learn that the microcontroller requires a Mult-PROG MCU adapter.

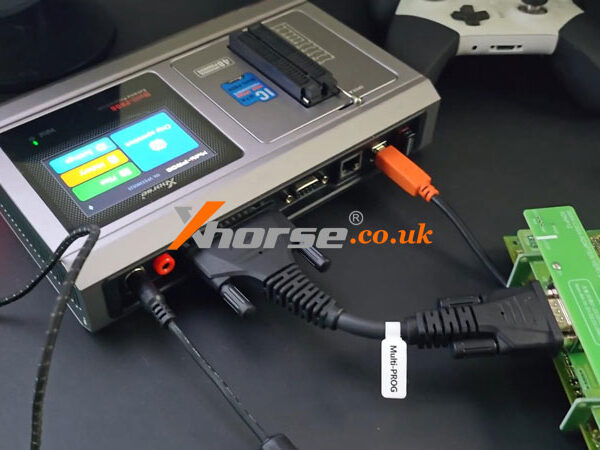
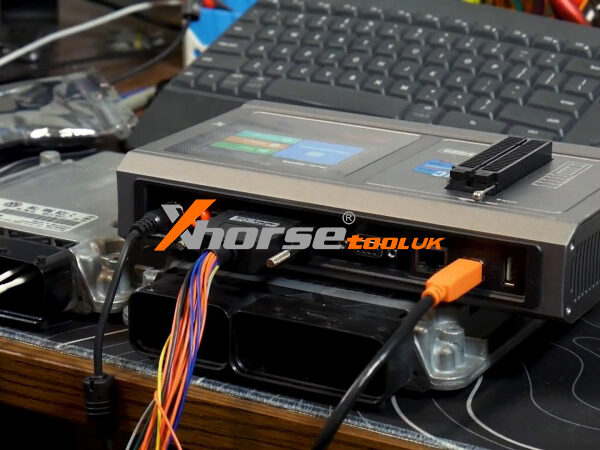
2. Connect to Multi Prog
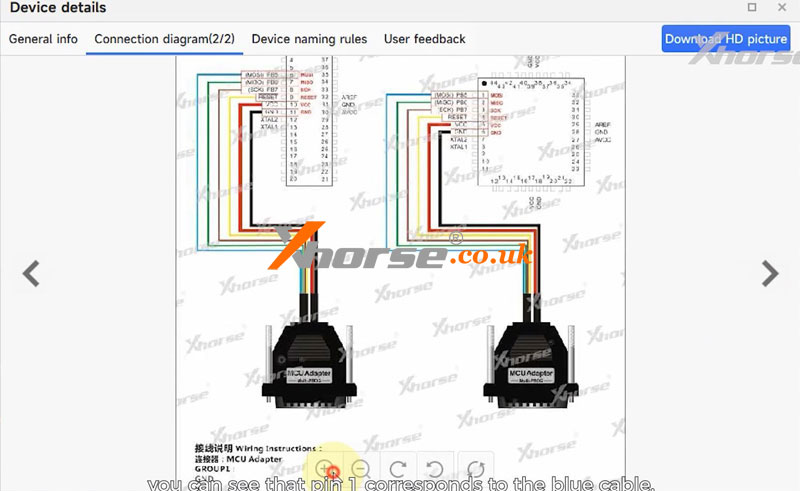
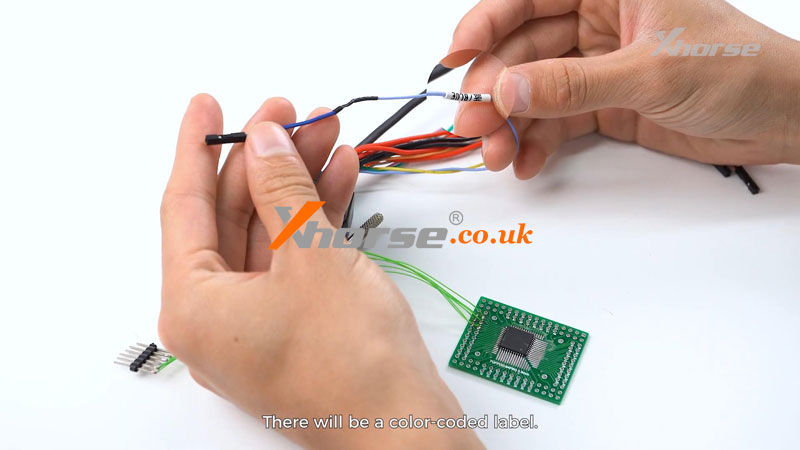
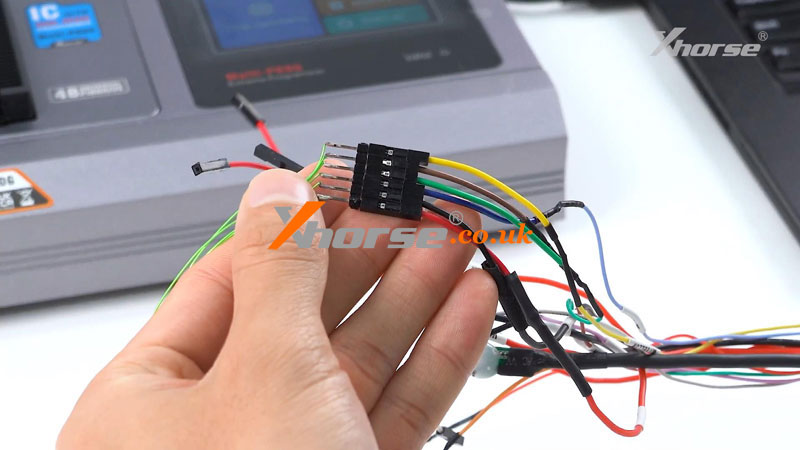
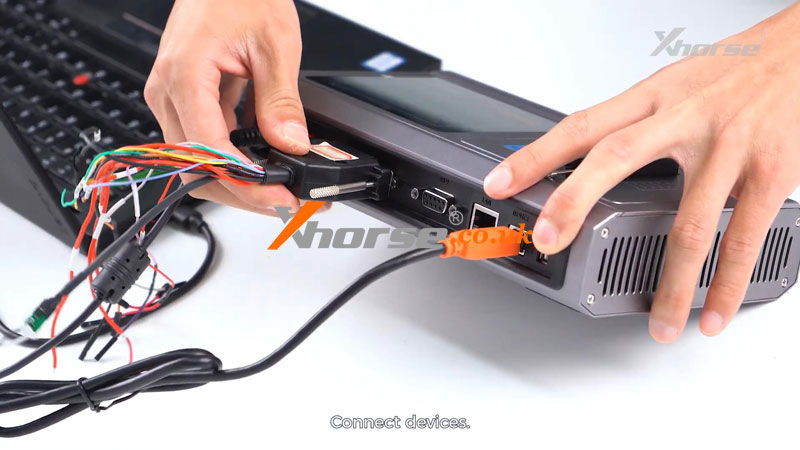
To facilitate connection and demonstration, we connected extension cables to the microcontroller and the adapter in advance.
From the connection diagram, we can see that pin1 corresponds to the blue cable. If we find pin1 and the blue cable, there will be a color-coded label. Connect them, the rest cables, and the Multi Prog device.
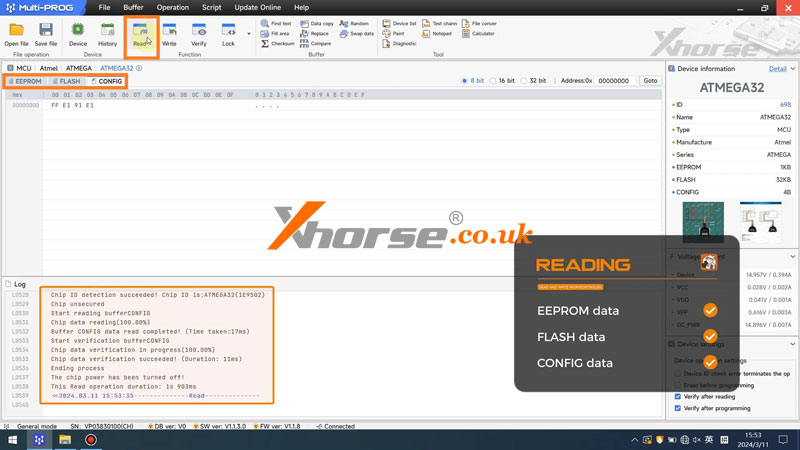
3. Read & Write Data
Let’s start reading & writing.
Multi-Prog supports reading EEPROM data, FLASH data, and CONFIG data.
Click “Read”.
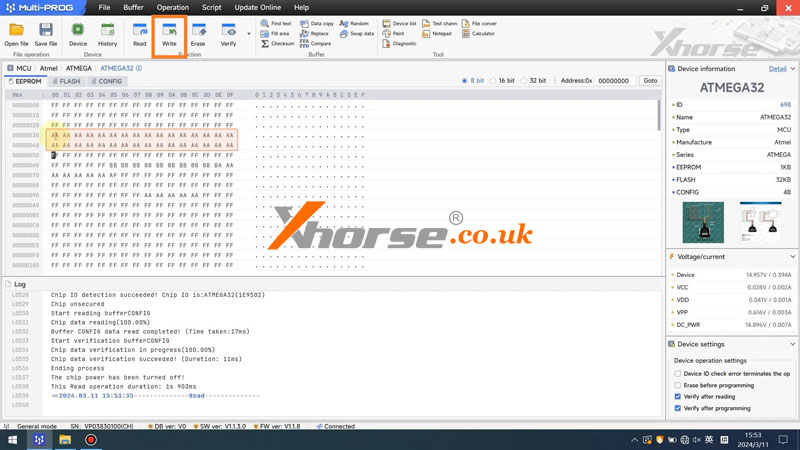
We can also modify the data just by clicking “Write”.
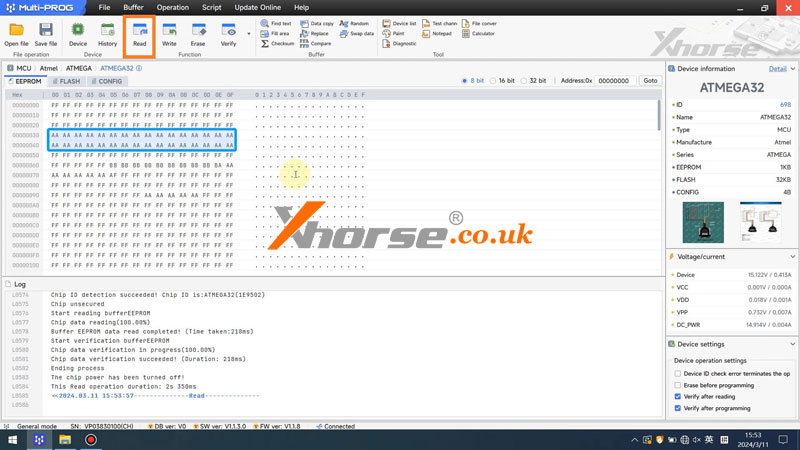
Read it again, we can see data has been modified successfully.